The late 1970s and early 1980s was a time of rapid evolution in cataract surgery. In a period of less than a decade, the standard of care changed from intracapsular cataract extraction (ICCE) with aphakic spectacles to microincision phacoemulsification with foldable posterior chamber lenses. Along the way, interim stops included ICCE with iris-supported lenses, ICCE with anterior chamber lenses, extracapsular cataract extraction (ECCE), ECCE with posterior chamber lenses, and phacoemulsification with rigid lenses. For the cataract surgeon, it was a challenging but rewarding time. Probably at no other time in ophthalmology have the surgical skills learned during residency become obsolete in a matter of a few years.
During the past decade, corneal surgeons have seen a similar revolution. For the past 50 years, penetrating (full-thickness) keratoplasty (PK) has been the standard surgical treatment for endothelial decompensation. In a period of less than 10 years, endothelial keratoplasty has all but replaced full-thickness keratoplasty as the surgical treatment of choice for primary endothelial dysfunction.
Similar to the change from ICCE to phacoemulsification, the skill set required for Descemet’s Stripping (automated) endothelial keratoplasty (DS[A]EK) differs from that required for PK. This paper discusses the evolution of DSEK and concentrates on the different donor insertion techniques, as this is the part of the procedure that differs the most among surgeons.
Descemet’s Stripping Endothelial Keratoplasty has Supplanted Penetrating Keratoplasty for Several Reasons1–3
- DSEK is, in effect, a closed-chamber procedure. During PK, there was always a period of time where the globe was unsecured (open). The time between removing the host cornea and completing the first four cardinal sutures was potentially catastrophic (suprachoroidal and/or expulsive hemorrhage). However, DSEK is performed through a small, peripheral and often self-sealing incision;
- given that most of the anterior cornea is left untouched in DSEK, the final anterior corneal curvature is often changed only minimally. This is in contrast to the frequent occurrence of high post-keratoplasty astigmatism and significant ametropia seen after PK;
- the surgical wounds after DSEK, being peripheral, shelved, and smaller, are less amenable to traumatic rupture or late wound dehiscence; and
- the combination of a more secure wound and minimal change in surface contour following DSEK enables a more rapid return of vision and less post-operative physical restriction.
DSEK does, however, have some disadvantages, which include:
- a learning curve where, early on, the rate of donor dislocation is often high (>15 %);
- the possibility of pupillary block glaucoma secondary to the air bubble in the anterior chamber, as well as appositional angle closure if the air migrates into the posterior chamber; and
- limited data on long-term endothelial survival. Early studies showed an accelerated endothelial cell loss with DSEK compared with PK, but subsequent intermediate-length reports have shown a stabilization of cell loss comparable to what has been reported for PK.
Indications and Contraindications
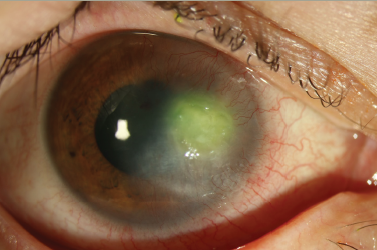
DSEK is indicated for conditions associated with corneal endothelial dysfunction, such as endothelial dystrophies (cornea guttata and/or Fuchs’ dystrophy, and posterior polymorphous), as well as aphakic or pseudophakic corneal edema or bullous keratopathy. Endothelial keratoplasty is not indicated for conditions associated with stromal opacification and/or ectasia in the setting of otherwise healthy endothelium (stromal dystrophies, scars, keratoconus, etc.). DSEK is also not indicated where stromal edema is so advanced as to preclude adequate visualization of the anterior chamber details.
Surgical Procedure
The main steps in DSEK surgery include: making the incision and ports, scoring and stripping of Descemet’s membrane, donor preparation, insertion and positioning, management of the air bubble, and wound closure. The following is a typical orderly approach.
- Position the patient to maximize exposure. Once positioned, mark the cornea (using gentian violet) typically with a dull trephine to outline the proposed size of the graft and to provide a guide in the area of Descemet’s membrane to be stripped.
- The main incision can be made through peripheral clear cornea or via a scleral tunnel. Incision width will vary based on the insertion device (forceps, glides, folders, inserters, etc.). The adage ‘the smaller the better’, typical for cataract surgery, does not apply here. Whereas a smaller incision will make maintaining the anterior chamber easier, it will also cause more trauma during insertion and a greater loss of endothelial cells. A wound width of 5.0–5.5 mm appears to be a good compromise.
- One or two additional side port stab incisions might be required depending on the insertion technique (discussed below). The secondary ports are used for an anterior chamber maintainer and a second instrument (if needed).
- The next step is to score the outlined endothelial surface gently for 360° to gently disrupt Descemet’s membrane. This is done using a reverse Sinskey hook or similar device. The anterior chamber is maintained with a separate chamber maintainer, an irrigating instrument or by the use of a cohesive viscoelastic.
- The same guidelines listed above for scoring apply for stripping and removing of Descemet’s membrane. A dedicated instrument is advised. These are wider than a Sinskey hook and semi-sharp, often with a slight turned-up edge to grasp the tissue.
- The donor lenticule is prepared. Most surgeons in the US use pre-cut donor tissue, where the Eye Bank has made the lamellar cut (either using a microkeratome or a femtosecond laser), and the surgeon then just punches the donor to the desired diameter. The typical donor punch is 8.0–8.5 mm in diameter in routine cases of endothelial dysfunction. Donor size is often modified by the clinical situation (e.g. DSEK after failed PK, where the donor cornea is sized to be inside the original graft–host junction). Recently, there has been a move to larger donor buttons, but these require a larger corneal or scleral wound and donors >9.0 mm are often problematic because of the proximity of the iris. Outside the US, most donor tissue is surgeon prepared, either manually or using a mechanical microkeratome. Eye Bank-prepared donor tissue offers not only greater convenience, but also appears more reproducible. Manual dissection of the donor has all but been abandoned in the US because of the irregularity of the stromal bed.
- Once the tissue is prepared, all viscoelastic (if used) is removed from the anterior chamber using any of the available irrigation/aspiration (I/A) devices.
- A well-maintained anterior chamber enables easier, less traumatic insertion, and easier orientation to insure that the tissue orients endothelial side down. The most common method used to maintain the anterior chamber is an anterior chamber maintainer inserted through the peripheral cornea. More recently, an irrigating inserter/injector has been made commercially available that obviates the need for additional instrumentation (discussed below).
There are numerous methods and/or devices that can be used to insert the tissue. They fall into a few broad categories:
Forceps—these are the most commonly used tissue-insertion device. Early on, it was noted that excessive folding and/or crushing would destroy endothelial cells. Numerous insertion forceps have been designed to minimize crush injury. Most of these are designed so that only the distal or distal and proximal portion of the forceps meet, minimizing the tissue compression (see Figure 1). Forceps have the advantage of being inexpensive and reusable. Most surgeons protect the donor cornea with a small amount of viscoelastic and use an anterior chamber maintainer. The donor corneal is typically folded in a 60/40 fashion to make unfolding easier and to assist in maintaining tissue orientation. Having an asymmetric fold (larger portion above) assists the surgeon in keeping the tissue properly oriented (endothelial side down). It was initially commonplace to mark the donor cornea with gentian violet to assist in visualization and orientation, but the stain was shown to be endothelial toxic. Trypan blue is used by some to assist in visualization of the donor and is particularly helpful when the host cornea exhibits advanced edema. Often, the donor will unfold when the anterior chamber is filled. In some instances, more forceful directed irrigation is needed to unfold the tissue, whereas in others, a reverse Sinskey hook or similar instrument is required to unfold and position the donor tissue.
Platforms—these are similar to forceps but the tissue is simply folded onto the platform and inserted (see Figure 2). Although the platforms induce less crush injury, there is also less direct control of the tissue. As with forceps, most surgeons use both an anterior chamber maintainer and viscoelastics.
Glides—these are devices that act as a semi-protected tunnel to assist in the insertion and orientation of the tissue. Most of these require that a second instrument be introduced across the anterior chamber to reach into the glide and pull the tissue into the chamber. The second instrument is typically a long, narrow forceps with a grasping edge, but can also just be a bent needle or cystotome. Glides require a separate anterior chamber maintainer. Reusable glides (e.g. Busin glide) and disposable glides (e.g. Tan Endoglide [see Figure 3]) are available.
Injectors—these devices (similar to a foldable intraocular lens injector) have the donor lenticule inside a protected barrel that is then inserted into the wound. Given that these devices are inserted completely through the wound, the device protects the tissue from wound-induced tissue compression. The tissue is then advanced or injected into the anterior chamber. Both irrigating (obviating the need for a separate anterior chamber maintainer, e.g. Neusidl Corneal Inserter [see Figure 4]) and non-irrigating injectors are available.
In addition to the above devices, some surgeons simply either ‘push’ the tissue into the eye on a bed of viscoelastic or pull the tissue in, similar to using a glide. To date, there is one technique that has been shown to be superior and the choice of insertion technique is based more on surgeon preference.
Once the tissue is successfully placed into the anterior chamber, the surgeon needs to insure that it is properly oriented (endothelial side down), in proper position (reasonably centered over the pupil), and adheres to the patient’s posterior stroma. This is all much easier to do in a deep and stable chamber. Before any further surgical manipulation, the wound (and any side incisions) needs to be secured. The number of sutures needed to secure the wound(s) varies depending upon the width of the wound, the length of the tunnel, and the wound construction. The wound(s) need to be secured so that the anterior chamber can hold a near-total air bubble without leakage.
Once the wound is secured, the anterior chamber should be partially reformed with balanced salt solution and then a small amount of air then injected underneath the donor cornea. Both manipulations (fluid and air) are best done with a 30 gauge cannula, which causes less distortion (i.e. leakage) than either 25 or 27 gauge cannulae. Care should be taken to insure that no air is injected in the interface (between the recipient and the donor cornea). Once a small air bubble is in place, the tissue needs to be positioned to its desired location. The donor lenticule can often be moved by gently stroking the surface of the patient’s cornea with a dull instrument (muscle hook or specifically designed ‘rollers’). However, the tissue often has to be directly contacted (using a reverse Sinskey hook or similar) and moved into position. Once the cornea is in the proper position, the anterior chamber needs to be filled with a nearly complete air bubble. Air needs to be injected slowly and in a controlled fashion. A rapid injection will often lead to leakage from the wound or will force air through the pupil behind the iris, and, if unrecognized, can lead to pupillary block and/or appositional angle closure. The eye should be firm, but not hard (we recommend ≥30 mmHg). A dilating drop given at this time will lessen the chance of pupillary block and might release any air that is trapped behind the iris. At this point, some surgeons make small ’venting‘ or ’draining‘ incisions through the host cornea into the donor–host interface to remove any trapped fluid or air. The use of venting incisions is somewhat controversial as there have been isolated reports of epithelial seeding in the interface and interface infectious keratitis.
The air should be left in under direct surgeon observation while the anterior chamber is totally air filled. The amount of time that a full air fill is left varies from surgeon to surgeon, and can be anywhere between 10 and 30 minutes, as it will vary depending on the intraocular pressure of the eye. After the waiting period, a portion of the air is exchanged with balanced salt solution. The amount of air left in the anterior chamber when the patient leaves the operating suite varies greatly among surgeons, but a reasonable starting point is to leave a bubble approximately the size of the donor button. Some surgeons leave a larger air bubble and ‘burp’ the wound to let out some air at the slit lamp after a longer waiting interval. The patient lies in a supine position in the recovery room for 1–2 hours (varies by surgeon) to enable the partial air bubble to continue to tamponade the graft in place (see Figure 5).
Complications
Immediate or peri-operative complications are usually secondary to pressure elevations. Overfill of the anterior chamber typically results in a pressure rise. This is readily managed by an air–fluid exchange or by simply letting some air out of the wound. Of greater concern is secondary papillary block or angle closure caused by air migrating behind the iris. Most surgeons dilate the eye at the conclusion of the case to relieve any trapped air. Repeat applications of both cycloplegics and sympathomimetics might at times be needed. On rare occasions, surgical (laser peripheral iridotomy) intervention might be required.
Partial or complete dislocations are common in early cases, decreasing with increasing experience. The dislocations rates reported in the literature vary from 0–82 % (with an average of 14 %) making their interpretation difficult.1 The exact reason for their decrease in frequency with greater surgical experience remains unknown.4 It is probably related to decreased endothelial damage with less manipulation, as well as better management of air tamponade and avoidance of hypotony. If the donor button is in a reasonable position, and only partially dislocated, and there is still an air bubble present, the patient should be instructed to remain flat on their back for an additional day. If there is no air bubble present, or if the bubble is so small that it would not tamponade the dislocated area, additional air can be injected. Complete dislocations require a large air bubble, similar to that carried out in documented. Buttons that fail to adhere after repeated attempts (repeat air injection) might have to be replaced because of widespread and irreversible endothelial damage.5
Early reports suggested that there was an accelerated endothelial cell loss with DSEK compared with PK. Larger long-term studies revealed similar rates of cell loss, although the cases were not matched and many surgeons intervene at an earlier stage of endothelial dysfunction than was common with PK.1,2,6 Similarly, graft rejection is hard to compare because of a lack of true case-controlled comparative studies, but appears, at worst, similar to full-thickness PK. Treatment regimens for graft rejection with DSEK do not differ significantly from PK. Irreversible graft failure is treated with removal of the donor lenticule, which typically can be peeled off the patient’s cornea and replaced with a new donor. Data on graft survival for repeat DSEK are lacking.7
Summary
DSEK has emerged as the treatment of choice for individuals with primary or secondary endothelial failure. It affords the patient a faster visual rehabilitation with less induced astigmatism. After an initial learning curve, endothelial survival after DSEK appears comparable to PK. Newer insertion devices, such as glides and inserters, have decreased the learning curve somewhat, but there is no consensus as to the single best surgical technique, and well-controlled studies comparing the different techniques are lacking. As with all surgical procedures, surgeons should observe multiple techniques to determine what best suits their surgical skills, and operating environment. ■